


Although iCloud has been introduced by the Apple especially for its users, the iPhone device users can use the Windows computer to install the iCloud on the Windows computer, and then they can the iCloud drive for Windows computer as well.
Here in this article, we are going to discuss the same aspect as to how iCloud can be installed on the Windows computer since the Apple has released the various versions of iCloud for Windows 64 bit/32 bit operating systems.
How To Setup & Install iCloud For Windows 10

Some of us the iPhone or iPod users might be using the Windows 10 computers and the topic of wonder for those people could be when they realize, that they can actually use the iCloud services on their windows computer.
Well yes, it’s absolutely true that you can use Apple’s iCloud services on the Windows computer and manage your Apple’s devices such as the iPhone, i-pad etc.
So, if you are figuring out the way of installing iCloud on Windows 10 then here we are going to assist you with that.
Here, First of all, you will need to get the iCloud for Windows 10 and within the iCloud for Windows, you will have access over your database such as the pictures, emails calendars etc to keep them up to date with your Apple’s devices. You will then be required to logging into your iCloud account for the Windows by your same Apple’s user id and the password.
After successfully logging in to the account the next thing that you see will be the sync folder, where you will decide that what kind of files you are willing to sync with Apple’s devices such as the pictures, emails or anything else.
Now from here, the process is quite easy and straight you just need to sync your require files to the iCloud device and the same files would be available for access by the other connected Apple’s devices to the same iCloud user account.
iCloud Control Panel For Windows

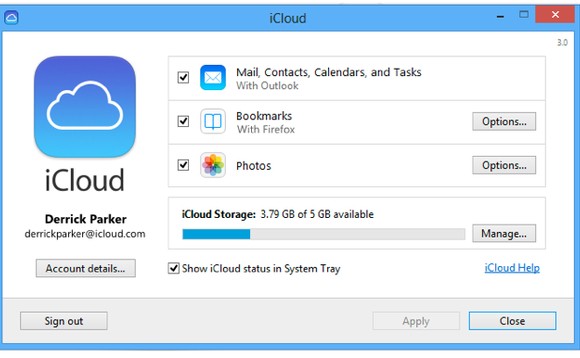
A control panel for iCloud is a tool which lets the users manage the required settings of iCloud as per the desired way of the user of iCloud. We know that Apple, however, allows the Windows computers to use iCloud, but they had not provided the reasonable iCloud control panel to the Windows users due to which many of the Windows iCloud users were facing difficulty with it.
Here the Cupertino has brought good news for all those Windows iCloud users as the new version of iCloud has provided decent compatibility to the Windows users as well.
This control panel will now enable the Windows users to safeguard their data from the loss, safety from the malware and many such control panel features are available for iCloud Windows users.
Earlier the many of iCloud users on the Windows pc were complaining about many issues such as all of the sudden crash of iTunes in Windows 10 but now with the all-new control panel feature users can now control such bugs.
The new control panel features in the iCloud are compatible both with the Windows 10 and 8.1 and with this the user gets the automatic signing feature with the outlook as well after the iCloud.
Steps To Install iCloud For Windows 10


Well as we have already discussed above that the iCloud service of the Apple is also available for the Windows computer users which means you can control or manage your iPhone, iPad, and other Apple’s device data by using the iCloud on the Windows computer.
So, if you are confused that how you can actually install iCloud on Windows computer since you might not even have heard about this fact before.
Here we are going to assist you in that by our step by step guide and you are advised to just follow that in the same way.
- First of all, you just need to get the setup of iCloud in your windows computer and the setup can be install from Apple’s website.
- After get the setup of iCloud the next thing which you need to do is to set up or install the setup of iCloud in the Windows computer.
- Now after you are done with iCloud setup installation then just open the iCloud setup.
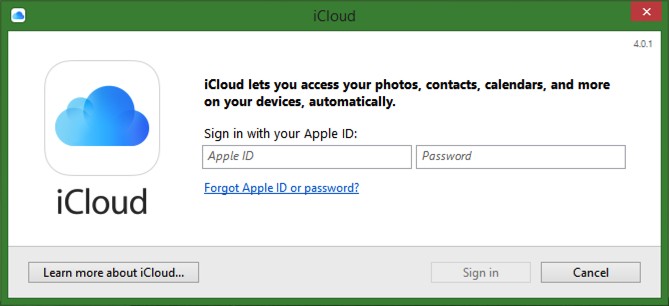
- You will be asked to provide your Apple’s user id along with the password just fill the login id there and hit on the sign in option.
- You will be signed in and you will see the syncing option next by which you can manage the flow of your data from the one device of the Apple to the other.
So, this is the step by step guide to install the iCloud on Windows 10 easily and now from there you can manage and update your Apple’s device data from the one to the other.
iCloud For Windows 7 Free Setup & Install


Well, just like the Windows 10 you can get and install iCloud setup on the Windows 7 computer by following the same steps just like the Windows 10.
Here we would like to make it clear that although Apple has provided its compatibility of using the iCloud on the Windows computer devices yet the Windows 10 and 8.1 are the only windows which are officially considered best to use the iCloud services on the Windows computer.
There are many reasons behind that and the most important among them is the lack of proper control panel compatibility of iCloud para Windows 7.
iCloud Control Panel For Windows 7
As we know that the control panel of iCloud enables the users to easily manage the various task and activities of the iCloud. The user can’t synchronize the photos, emails or other media using the Windows computer without having the access on the control panel, hence if you are using the iCloud on Windows 7 then you must be having the iCloud control panel for Windows 7.
When it comes to the Apple for providing the iCloud control panel the Apple has although released the iCloud control panel for the Windows 7 users, but the users have been having some kind of issues about the compatibility of the control panel with the Window 7.
You can setup and install the control panel for Windows 7 from the official website of Apple’s iCloud services.
Steps To Install iCloud For Windows 7
The Window computer users who are using Windows 7 on their computing device and want to setup the iCloud on their computer can easily do it now.
Yes, you can manage and update the database of your Apple’s device such as iPhone, iPad, etc by using the iCloud on the Windows 7 computer. Here below we are going to provide you the step by step guide to
- First of all, you need to install the iCloud version for Windows 7 as has been released by the Apple on their official website.
- After getting the iCloud setup of Windows 7 you just need to install it on your Windows computer and if you face any issue while installing the iCloud then you can contact Apple help support to get assistance in this regard.
- Now since you have installed the iCloud on your Windows computer the next thing that you need to do is logging to the iCloud account.
- You can use your Apple’s user id and the password to login to the iCloud account and after logging in you will be able to synchronize the data such as emails, calendar or any media with all the other connected device of Apple to that account.
You can use the iCloud Windows 7 control panel to manage the various features of iCloud on your Windows computer.
iCloud For Windows Installation Error

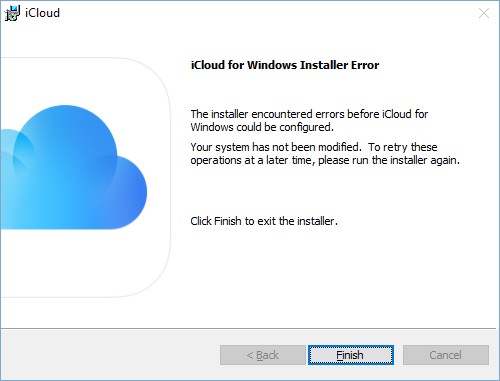
There could the error faced by any user while installing the iCloud on the Windows computer and the error could be of several types either related to the getting of iCloud on the Windows computer or it could be regarding the installation of the iCloud on the Windows computer.
If you are facing any kind of issues while getting iCloud on your Windows computer then we suggest you try out a different Internet Explorer (or similar) browser since sometimes it could be the fault of the browser that you are using.
On the other hand, if you are seeing an error while installing iCloud on Windows such as the error of missing media features on your computer then you can easily fix this error as well easily.
In order to fix the missing media features error, you just need to turn on the Windows media features, since if the Windows media player features are turned off then you can’t install the iCloud on your computer. You can easily turn on the Windows media features from the file explorer control panel of your computer.
If you are facing some other kind of error while installing iCloud then you can visit the iCloud website of the Apple and try searching out the listed solution for your issue on the website, and yet if the issue remains unresolved then you should reach out the Apple support center to get your issue resolved.
iCloud For Windows Login

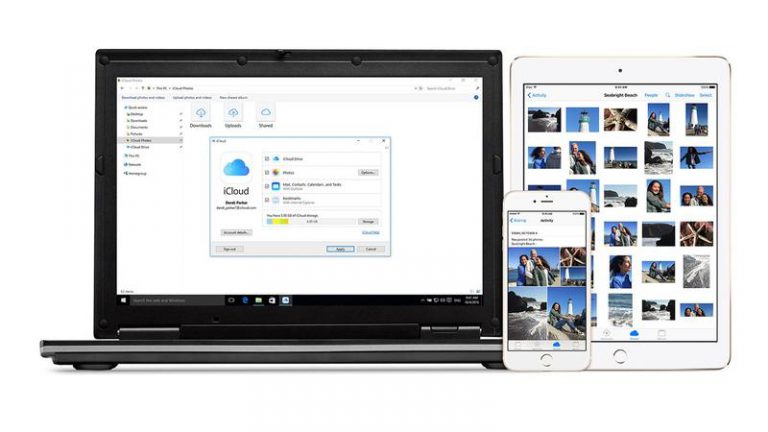
We know that you can install iCloud on Windows computer and they can synchronize Apple’s device data from the iCloud to keep the data updated and shared between all your other Apple’s devices.
Here when you install iCloud on Windows computer the next thing which you need to do is log in to iCloud account by using the Apple’s user id and the password.
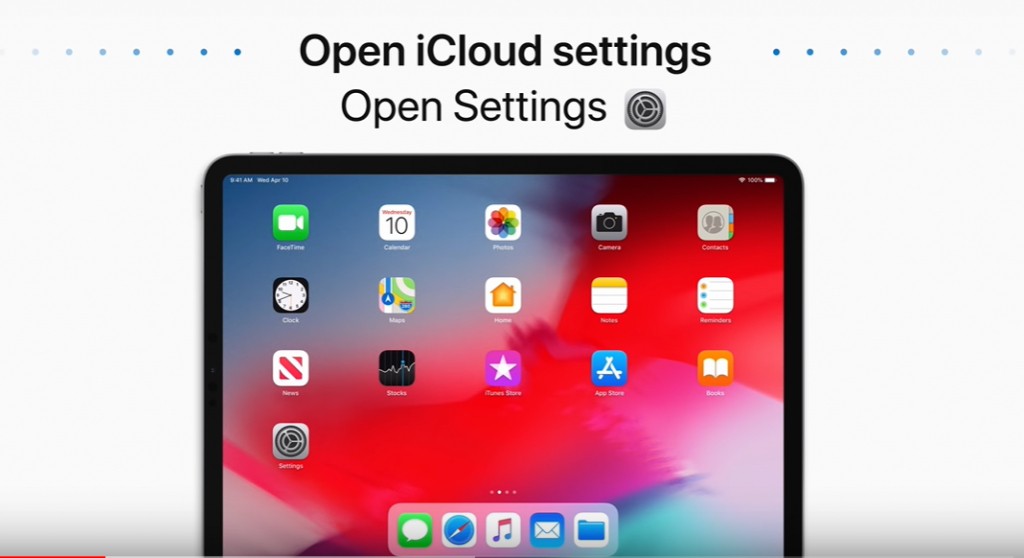
How To Set up iCloud on Windows
Yes, you can use the same id and password of Apple’s iCloud account to get the access to iCloud on the Windows computer. Once you are successfully logged in to the iCloud then you can use all the iCloud drive for windows in a similar way as if you are using it on the Mac book, however, the user experience depends upon iCloud’s control panel compatibility with the Windows computers.
Whats Is My iCloud?
- iCloud is Apple’s cloud computing and storage service by Apple which allows users to store documents, data, photos, etc. remotely on any device which is synced with your Apple ID.
- Its services include allowing users to check and update their emails, calendars, photos, etc.
- You can set up iCloud on your iPhone, iPad, iPod Touch, Mac. You can even set up and install iCloud on your Windows PC.
- Once you set up your iCloud account on your Windows PC, you can have access to all your photos, calendars, bookmarks, documents, etc. on your Windows PC.
- iCloud also provides service for backup and restore of all data. It provides a free storage space of 5GB to all users in the beginning. You can upgrade the storage space from a total of 50 GB, 200 GB or 2 TB, as per your preference.
How Do I Access My iCloud Mail?
iCloud is a cloud storage service from Apple which allows users to send and receive emails anywhere from their iPhone, iPad, Mac, or even your Windows PC. So you want to how to access icloud email by logging into a device and remotely accessing it from any other device, even your Windows PC.
Here are the steps how you can check your iCloud email from any browser.
- Open your web browser and go to the iCloud website.

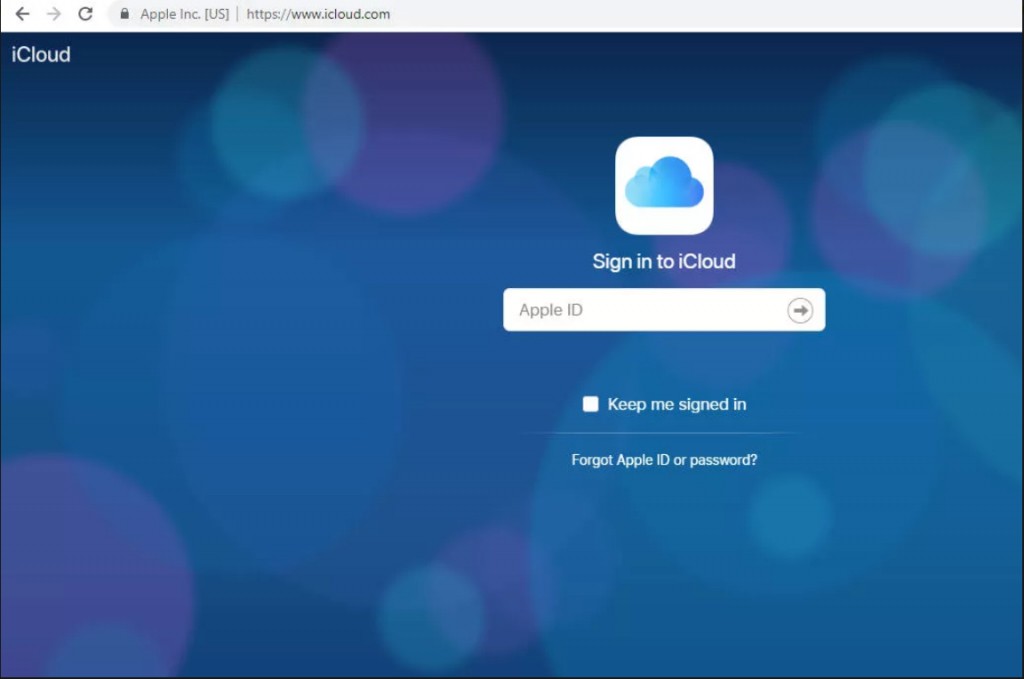

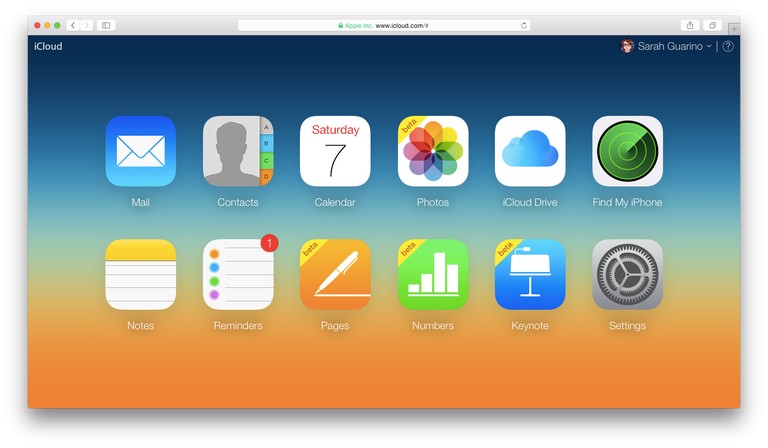
- Now you shall find many options in the screen, such as Contacts, Mail, Calendar, etc. Click on the Mail icon.


- You can click on the Mail icon to receive and read new emails on any device. Or send a new email.
Is iCloud and iCloud Drive The Same Thing?
iCloud and iCloud Drive are the two services provided to Apple users. Both these services are useful for storing data such as photos, videos, documents, etc. So if you want to access all your files and documents from iPhone, iPad, Mac, and even Windows, then you must know the difference between iCloud and iCloud Drive. Here we shall explain to you the basic difference concept of iCloud and iDrive.
- iCloud is an umbrella term for the host of services provided by Apple which is provided in all the Apple devices. It keeps all your photos, files, notes, etc. safe and makes it accessible wherever you are.
- It provides you with 5GB of free storage space to every user. And you can upgrade the storage space which you can purchase anytime.
- iCloud Drive is like Dropbox and Google Drive services which allow you to upload all your documents in one place and access them from your iPhone, iPad, Mac or PC.
- It allows you to organize files, rename them, and color code them differently with colors. This way, you can easily update information in all your devices when you want to make a change.
- iCloud Drive is one of the services provided by iCloud. It organizes and safely lets you access all your documents remotely from your iPad, iPhone, Mac or Windows PC and lets you stay updated every time.
How Do I Access Photos in iCloud Photo Library?
iCloud Photos enable you to upload all your photos and videos to iCloud Photos library and access them seamlessly using any device. So if you have any question regarding How Do I Access Photos in iCloud Photo Library, you can read this guide here. iCloud Photos Library works flawlessly with the Photos app to keep you up to date on your iPhone, iPad, Mac or PC.
To enjoy the services of iCloud Photos, you can follow the given steps:
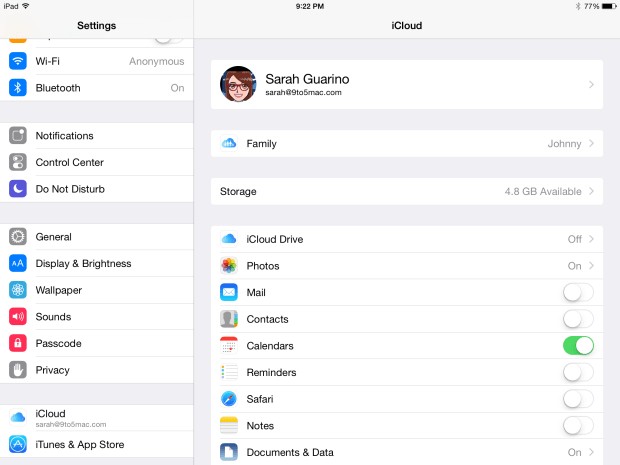
- First, you need to set up iCloud on your device. Make sure that your iOS device is set to version 8 or higher. Likewise, you can update Mac to the latest macOS, and your Apple TV 4K and Apple TV HD to the latest tvOS.
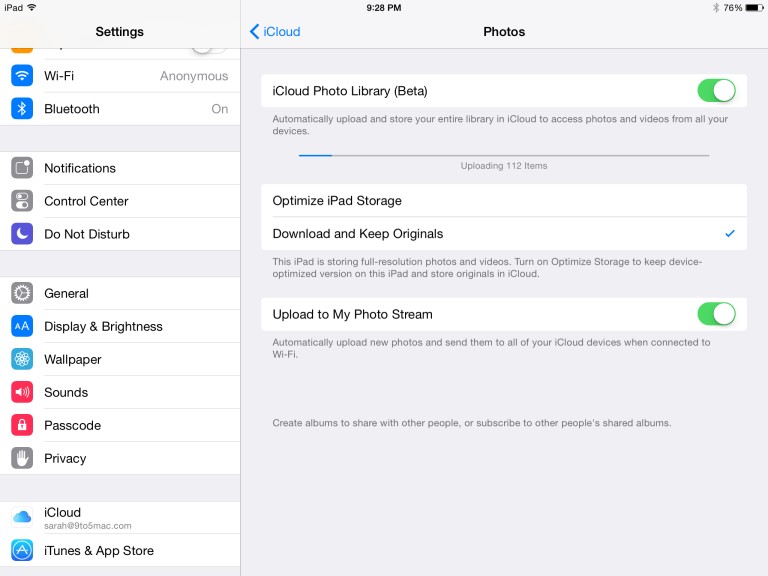
- Then you need to go to Settings>iCloud and turn on Photos. The photos will only upload over wifi. If you have iOS 11 version or higher, you have the option of getting over mobile data.

- After turning on iCloud Photo Library, you will be given the options to handle the photos: Optimize iPhone/iPad or get and Keep the Originals. Choosing the first option will reduce the file size of the picture and keep the original version in iCloud. Choosing the second option will save the full-resolution version of the picture in iCloud.
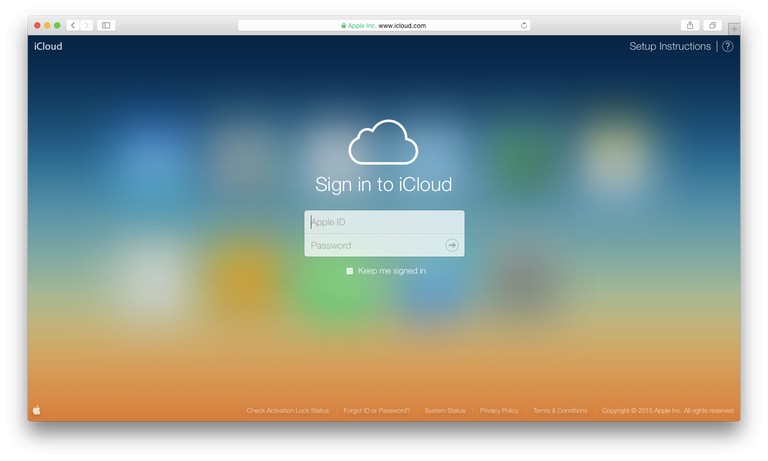
- To view your pictures on iCloud from your iOS device, go to iCloud website and login with your Apple ID and password.

- Now to view your iCloud Photo Library, click on Photos.

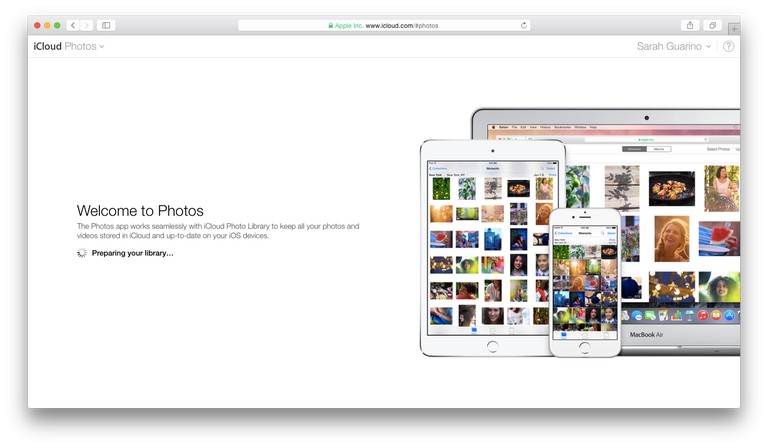
- If you are opening your iCloud Photo Library for the first time, it prepares it. It might take a few minutes for the process to complete.
How Do I Get My Old Pictures From iCloud?
One of the most common questions of iCloud users is that how to get old photos from iCloud?You might have accidentally deleted a photo or a file or might have lost it while transferring the data from one device to another. But it is possible to recover old or deleted photos from iCloud. We shall discuss here the steps for retrieving your old photos or videos from iCloud:
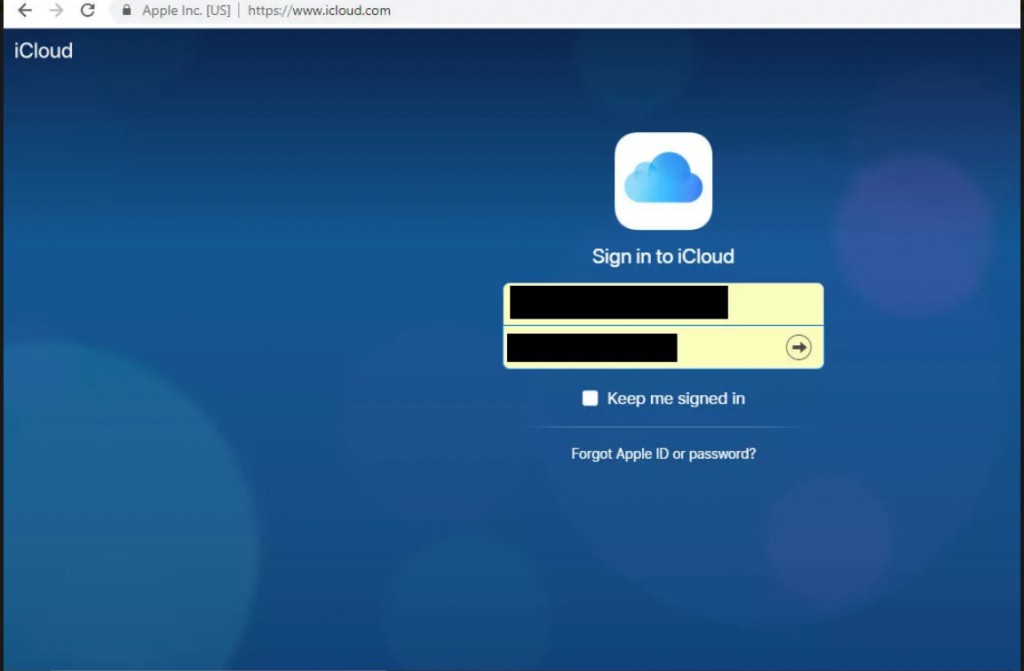
- Firstly, open your web browser and go to iCloud account and sign in with your Apple ID and password.
- Then from the bottom left, click on Advanced>Restore Flies.

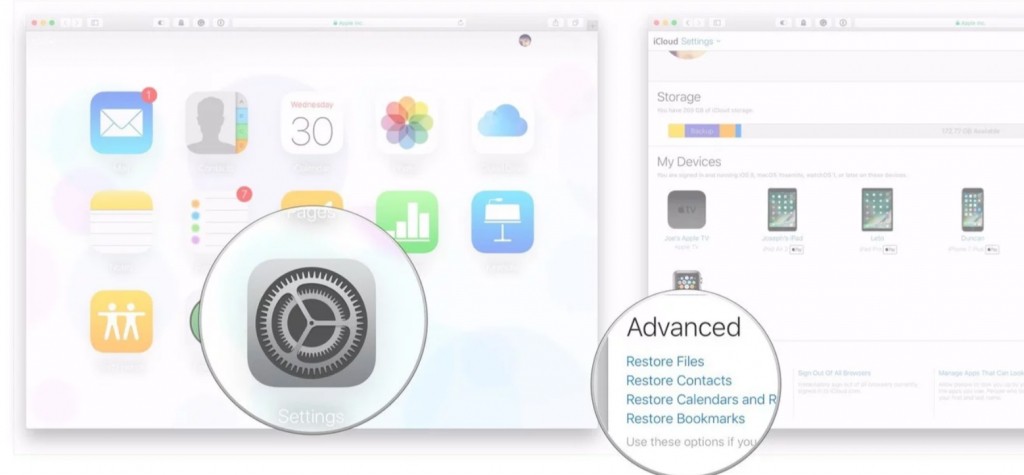
- Now all your files will appear. Check the boxes against the name of the files which you want to restore.

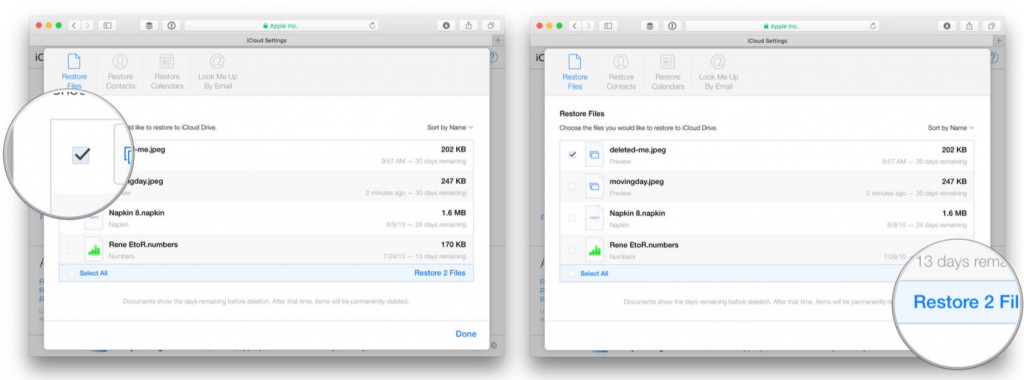
- You can recover any photo from iCloud only until 30 days after the photos have been deleted. After that, the photos would be automatically permanently deleted.
How Can I See My iCloud Photos Online?
The Photos app in apple is a powerful and reliable app which allows you to seamlessly view, organize and share your photos and videos with everyone. But if you want to carry your photos with you everywhere and make them accessible in every device, then you can use the iCloud app. Here’s how you can view your Photos Library online using iCloud Photos:
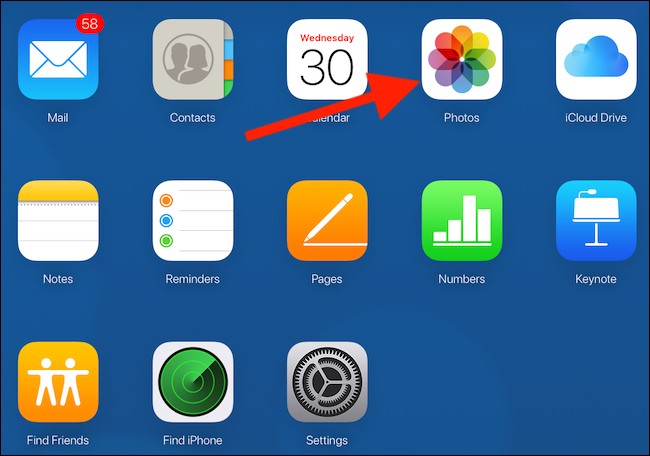
- Open Safari or any other browser and go to iCloud.
- Then log in with your Apple ID and password.
- Then you will be taken to the iCloud Home Screen. Click on Photos option from there.

- The iCloud Photos Library is similar to the Photos app in Apple, but with some lesser features. You might not find the same editing tools as the Photos app, but you will be able to view the photos and videos you have stored to iCloud online.
- Once you have opened the iCloud Photos Library for the first time, it might take some time to load. You might see the message “Preparing Library”. You must wait patiently and return after some time.
- If you want to upload a new photo or video, click on the Cloud icon with an upward arrow at the top of the page.

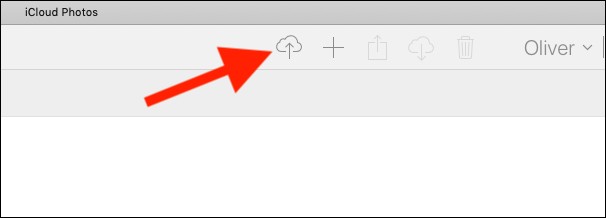
- For switching between Moments and Photos view, click on the desired option from the top of the screen.
How To Reset iCloud Password?
If you have forgotten your password and cannot sign in to your Apple account, you need to Reset iCloud Password. Here we shall provide you with some steps which you can follow to reset your password and sign in to your iCloud account again.
- The protocol for resetting your password depends upon the security measure you have opted for. If you have not opted for the two-factor authentication, you will need to use your email ID or answer the security question to change your password.
The procedure for changing your password is different for the various devices.
From Your iPhone, iPad or iTouch
- First, go to the System settings to make sure that your device is updated to iOS 10 or higher.
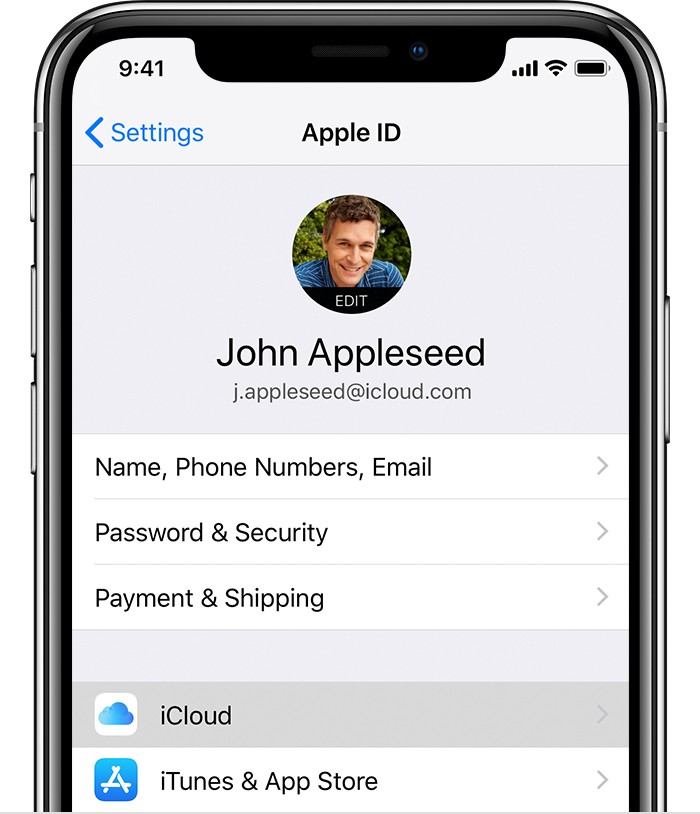
- Go to Settings.
- Then tap on your Name>Password & Security>Change Password. Then follow the protocol provided to update your password.


- For iOS 10.2 or later, tap on iCloud>your Name>Password & Security>Change Password and follow the instructions as provided.
From Mac
- From the top -left, go to the Apple Menu>System Preferences and then select iCloud.
- Then select Account Details
- You might be prompted to enter your Apple ID and password. Click on “Forgot Apple ID or Password” option and follow the instructions as provided.
- Click Security>Reset Password. For safety purposes, you would be asked the password which you use to unlock your Mac.
Using Recovery Key
For iOS 11 or higher, or macOS Sierra or later, if you have enabled the two-step verification, you can use the recovery key to reset your password.
How To Backup To iCloud?
Backing up your data using iCloud is beneficial since it enables you to have a copy of your information in your device in case it gets stolen, lost or damaged. So if you want to know How To Backup To iCloud we have provided you with the steps here:
- First, make sure that your device is connected to a strong wi-fi network.
- Then go to Settings>your Name and tap on iCloud.
- Then tap iCloud Backup.

- Click on Back Up Now. Make sure your internet is connected until the backup process is completed.
- You can even check the progress of the backup or confirm if the backup has been completed. For that, click on Settings>Your Name>iCloud>iCloud Backup. This will show you the time and date of the last backup.
How To Login To iCloud?
Once you have created your iCloud account, you can log in to it from any device. So to help you access all the services of iCloud, we have provided you with the steps of How To Login To iCloud.
- From any browser, open iCloud and sign in using the Apple ID and password which you used to set up your iCloud account.
- If you have enabled the two-factor authentication, sign in using the Apple ID and password which you use with iCloud.
- Then you would be sent a unique code on your trusted device. Enter the code sent to verify your identity.
- After you verify your identity, you can access all your apps, except the Find My iPhone. You can access Find My iPhone feature by clicking after entering your Apple ID.
- If you sign in successfully and can view your Contacts, Notes, Pages, Numbers, Keynote, and Settings, your account only has access to iCloud web-only feature. For having full access to all the features, you can log in to your iCloud account on your iOS device or Mac.
How Much is iCloud Storage?
If you are wondering whether you can get more iCloud storage, you must know How Much is iCloud Storage? iCloud gives 5GB of free storage to anyone who signs up using any iOS device. Apple has also recently given the option to Apple users to purchase their storage plan to upgrade your plan to larger storage space. Here we shall explain how it can be done:
- You have the option of upgrading your iCloud storage plan to a total of 50GB, 200 GB or 2TB.
- You can use any device such as iPhone, iPad, iPod Touch, Mac or PC to upgrade your plan.
From Your iPhone, iPad or iPod Touch:
- Go to Settings>Your Name>iCloud>Manage Storage or iCloud Storage.
- If you are using iOS 10.2 or higher, go to Settings>iCloud>Storage.
- Tap on Buy More Storage Space.
- Now you shall be provided with the different storage options. Choose a plan which is convenient for you.
- Tap Buy and follow the protocol as given in the screen.
From Your Mac:
- Click on the Apple menu from the top of your screen. Then go to System Preferences>iCloud.
- Click on Manage in the lower-right corner.
- Next, choose between Change Storage Plans or Buy More Storage.
- Click Next and enter your Apple ID and password.
From Your Windows PC:
- From your browser, go to iCloud For Windows.
- Click on Storage.
- Next click on Storage Plan.
- From the options. choose a plan which is convenient for you and click on Next.
- Enter your Apple ID and password and click on Buy.
How To Use iCloud Storage?
You can buy iCloud storage apart from the free plan which is already provided. Here we shall discuss How To Use iCloud Storage? If you run out of the 5GB storage space which is provided to you initially, you can easily manage your storage space or purchase more storage space.
Here we shall provide you with the steps regarding how you can check your iCloud storage and manage it:
For iOS version 10.3 or later
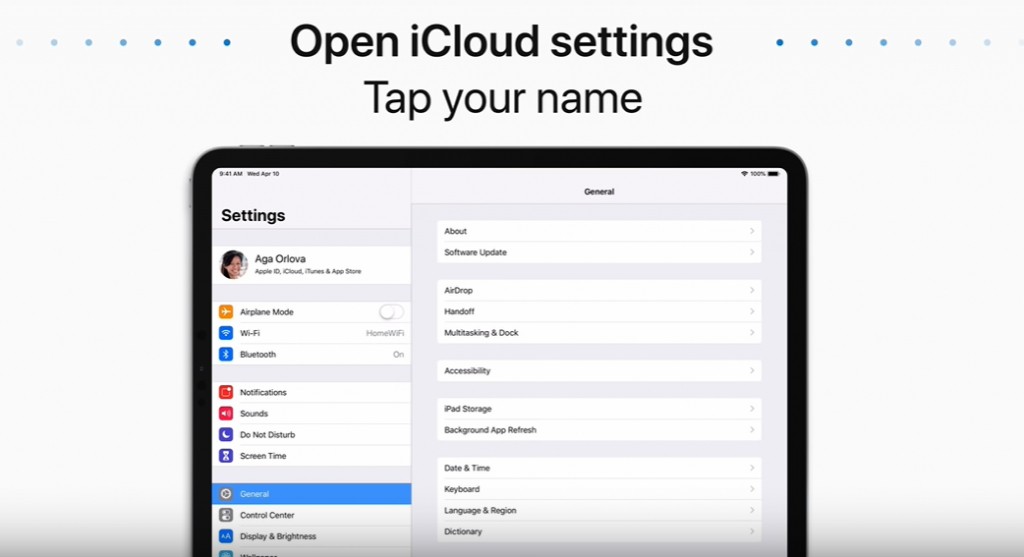
- Go to Settings>iCloud.

- Then from the Settings, tap on your name

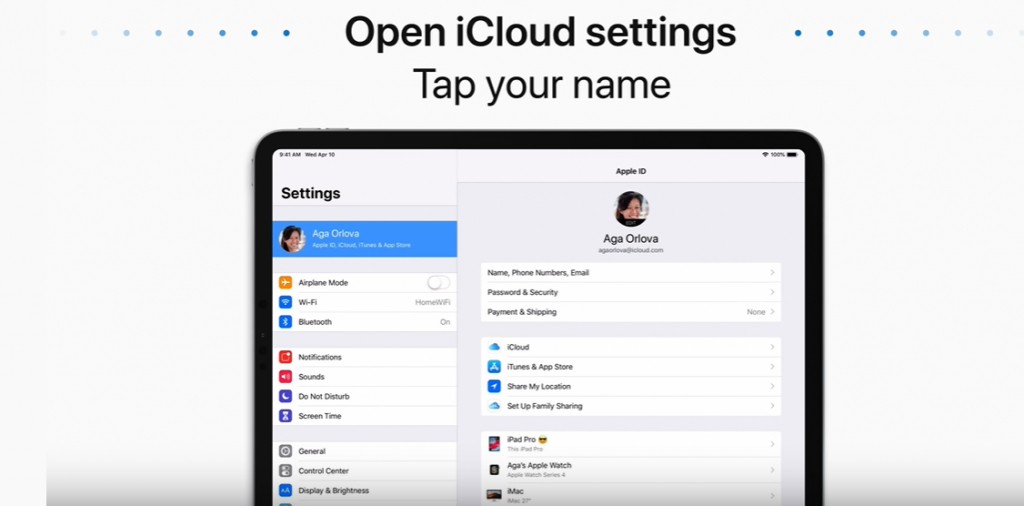
- Then from there tap on iCloud.

- From here, you can check the storage being used up by your iCloud account. You can renew it by upgrading to a larger storage space if you are running out of one.

How To Unlock iCloud?
iCloud is used in Find My Phone feature of iCloud, which is used to prevent anyone from using your iPhone, iPad, or any other device. So if you have enables the Activation Lock by mistake here’s the steps How To Unlock iCloud. Remember that without unlocking your iCloud, you won’t be able to use the phone without unlocking it.
Activation Lock is an extremely effective tool built to prevent theft of information in case your device gets stolen or lost. So in case you need to unlock your device, you will need to enter the Apple ID and password you used to activate the phone.
If you want to sell your iPhone to someone or give your device for service, you should turn off the Find My iPhone feature. Otherwise, anyone who uses the device won’t be able to use it or repair it.
For iOS 10.2 or earlier:
- Tap Settings>iCloud.
- Now scroll down and click on Sign Out.
- Choose the option Delete From iPhone and enter your password.
- Now go back to Settings.
- Tap General> Reset>Erase All Content and Settings.
For iOS 10.3 or later:
- Tap Settings > Your Name.
- Now scroll down and tap on Sign Out.
- Enter the Apple ID and password and tao Turn Off.
- Go back to Settings.
- Tap on General> Resets>Erase All Content and Settings.
How To Check iCloud?
Apple has come up with iCloud to allow users to save and synchronize data, photos, videos, notes, etc. If you require to know How To Check iCloud here are the steps :
On iPhone & iPad:
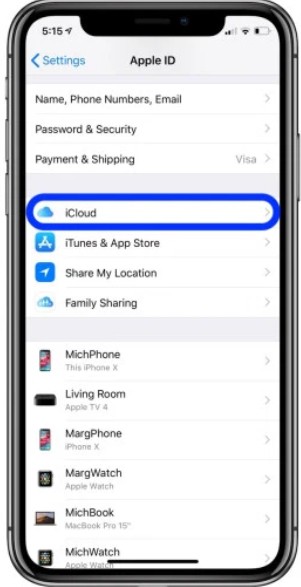
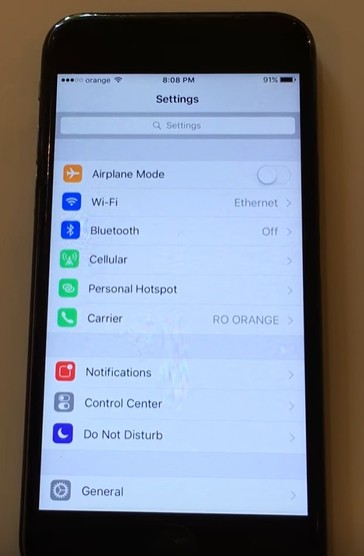
- Go to Settings and tap on your Name.
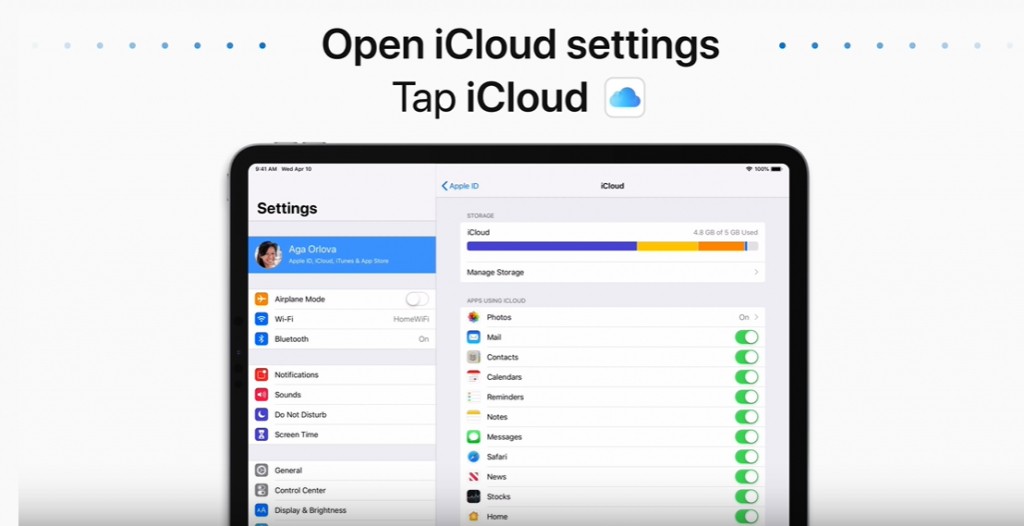
- Choose iCloud.

- You will see the loss of all the apps which you can sync using iCloud.

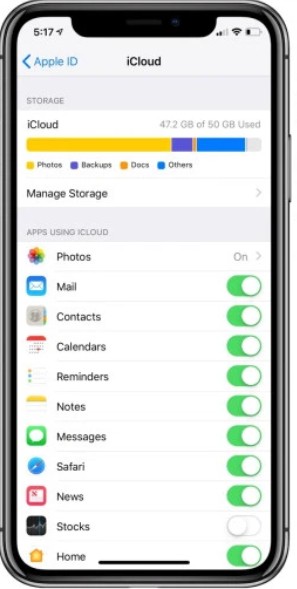
- To manage whether you can sync an app using iCloud, you can toggle on the right to enable it.
- If you want to backup your photos and other documents, go to the bottom and tap on iCloud Backup.
How To iCloud Unlock iPhone 6?
An important feature of iCloud is the Activation Lock, which is used to keep your documents and data secure and keep people away from accessing it. If you have purchased an iPhone 6 you must know How To iCloud Unlock iPhone 6.
Activation feature is automatically unlocked on all your devices when you enable the Find My iPhone feature. Once enabled, you cannot unlock it unless you have the correct Apple ID and password with you. So here are the steps tp unlock Activation Code in iPhone 6:
- Ask the person from whom you have purchased the iPhone to go to iCloud website and enter their Apple ID and password.
- Then select Find My iPhone.
- Select All Devices, then select the iPhone which needs to be unlocked.
- Click on Erase iPhone.
- Select Remove Account.
- Once the process is over, restart your iPhone. You won’t see the Activation Lock again.
How To Unlock iCloud Account?
If you cannot access your iPhone since someone has entered a password or other relevant account information too many times, your Apple ID is automatically enabled to protect your information. Here we shall discuss How To Unlock iCloud Accounting such situations.
Here we have explained the steps how you can unlock your iCloud account by configuring the DNS:
- Restart your iPhone or iPad.
- Complete the whole initialization process until “Choose My Wi-Fi Network”.
- Press the Home Button. Then click on “More Wi-Fi Settings”
- Click on Configure DNS>Manual.
- Click on Add Server.
- Then enter the server address of the location. Here we have provided you with the server addresses of different locations:
USA: 104.154.51.7
Europe: 104.155.28.90
Asia: 104.155.220.58
Africa, Australia, and other locations: 78.109.17.60
- Click Save.
- Then go back and select “Join This Network”
- If there is a requirement, enter the Network and Password and click on “Join”.
- When the iPhone activates, click on the back button.
You can now configure your iPad or iPhone as usual.
How To Delete iCloud Account Without Password?
Using the iCloud account, you can have access to many of its services such as syncing photos, videos, etc. You might be searching online for how to delete iCloud account without a passwordsince you might want to set up a new iCloud account. Usually, you need to enter the correct ID and password in order to delete your account. But in case you forget your password, there’s still a way to delete your account. Through these steps, we are going to explain how.
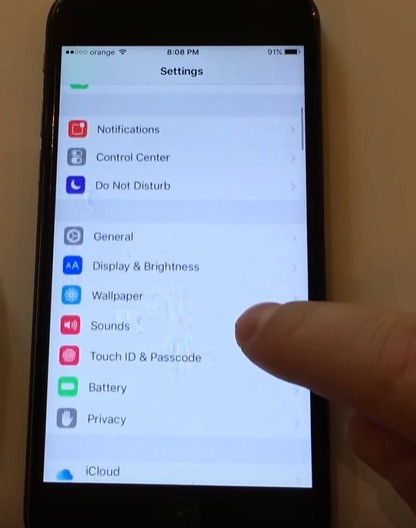
- First, go to Settings>General.

- Then from there, check that your device is working on the latest version of iOS.

- Then go to iCloud.

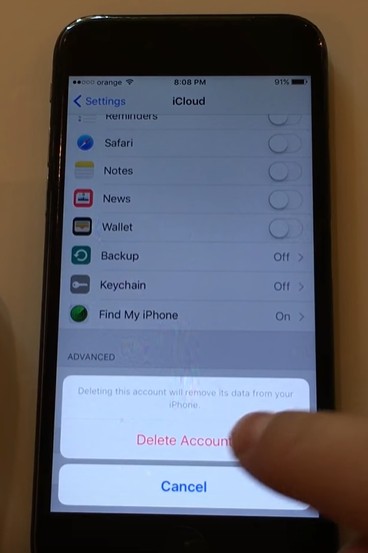
- Then scroll down and tap on the Sign Out option. Then select Delete Account.
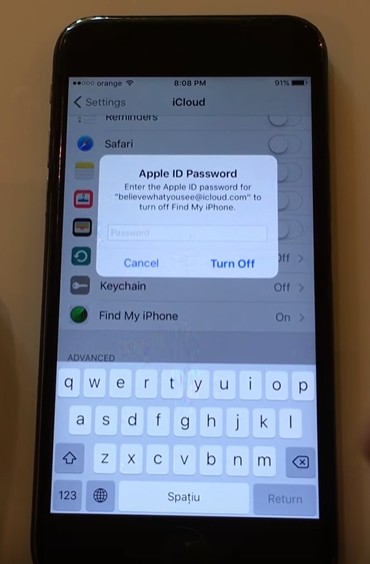
- Then a screen will appear asking for Apple ID and password. Tap on Turn Off.

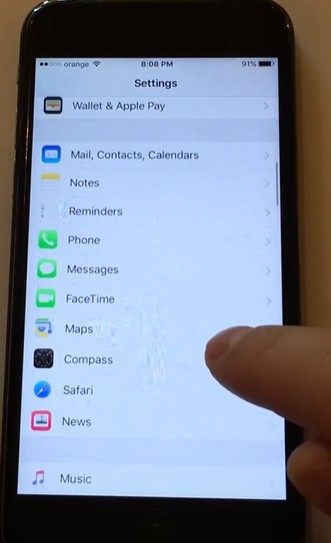
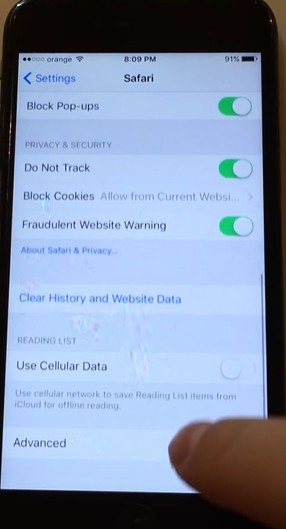
- Go back to Settings>Safari.

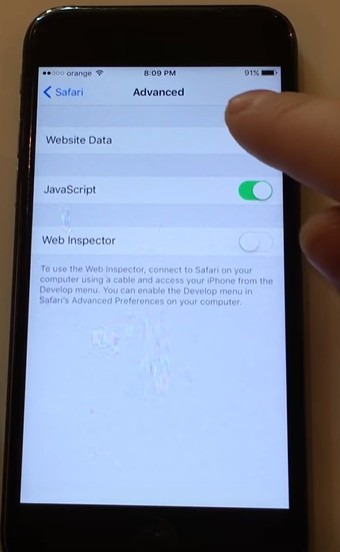
- Then scroll down and select Advanced.

- Then tap on Website Data.

- Then the list of all the websites will appear. Scroll down and select Remove All Website Data.

How To Delete icloud Photos?
If you want to delete photos from iCloud photos due to low storage space. So if you to keep extra storage space in your iCloud, or just unclutter your Library, you can follow the given steps:
If you have turned on iCloud Photos on iOS device (version 8.1 or later) or Mac (OS X 10.10.3 or later):
- the photos or videos that you delete are removed from iCloud and all the devices where iCloud is turned on.
- if you haven’t turned on the iCloud Photos in your iOS or Mac device, then you can directly delete the photos or videos from the Camera Roll album from your iOS device. This way, they won’t be backed up in iCloud.
You can also delete the photos and videos using the Photos app on your Mac (OSX 10.3 or later.